

How To Set Skybox On Camera Unity
This demo showcases how Camera Stacking tin be used to depict a 3-Dimensional Skybox which is used to better visual allegiance of the unreachable areas of a scene.
- Can exist found at
_CompletedDemos/3DSkybox/3DSkybox.unity - Uses Camera Stacking which is part of the URP Package
- Different cameras for creating the illusion of 1000 scale
A 3D Skybox is a miniature "subscene" residing exterior the bounds of the playable area. Information technology is rendered behind the playable area to create the illusion that the game world is much larger than it actually is. Compared to only having a second skybox, the elements in the 3D skybox have the reward of being rendered in real time and can therefore contain animations, particles etc.

The Setup
Configuring Cameras
The scene has one actor camera, and one camera for each 3D skybox. In the mutual case, a single 3D skybox is plenty to achieve the desired effect. In the space scene example notwithstanding, since distances are then big, an additional camera has been created to render a 3D skybox with objects that are very far away (stars). This gives three cameras. 1 for rendering the role player, one for rendering the planets, and one for rendering both the stars and a second skybox:
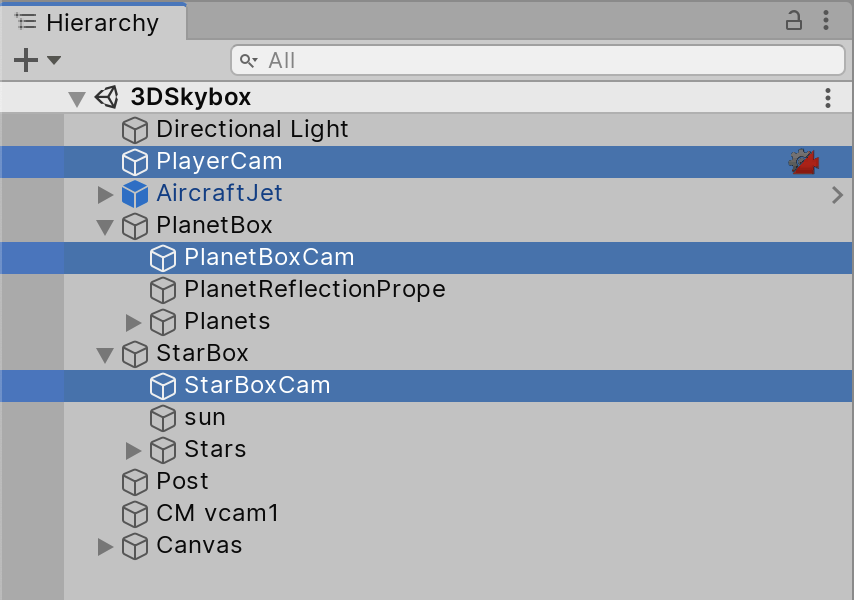
The camera stack list on the base camera determines the order which the overlay cameras should be rendered in (top to buttom). This intuitively means that the skybox furthest away should exist the base of operations camera, and that the planets and player should be drawn on top equally overlay cameras. This is withal not platonic for operation equally whatsoever stars blocked by a planet, or planets blocked by the actor, will be drawn regardless. Therefore, we would like to be able to draw the closer objects first. This is achieved by having a different render pipeline for each camera. Each return pipeline will override the stencil buffer such that the overlaying camera does not draw on top of what is already at that place.
Histrion Camera
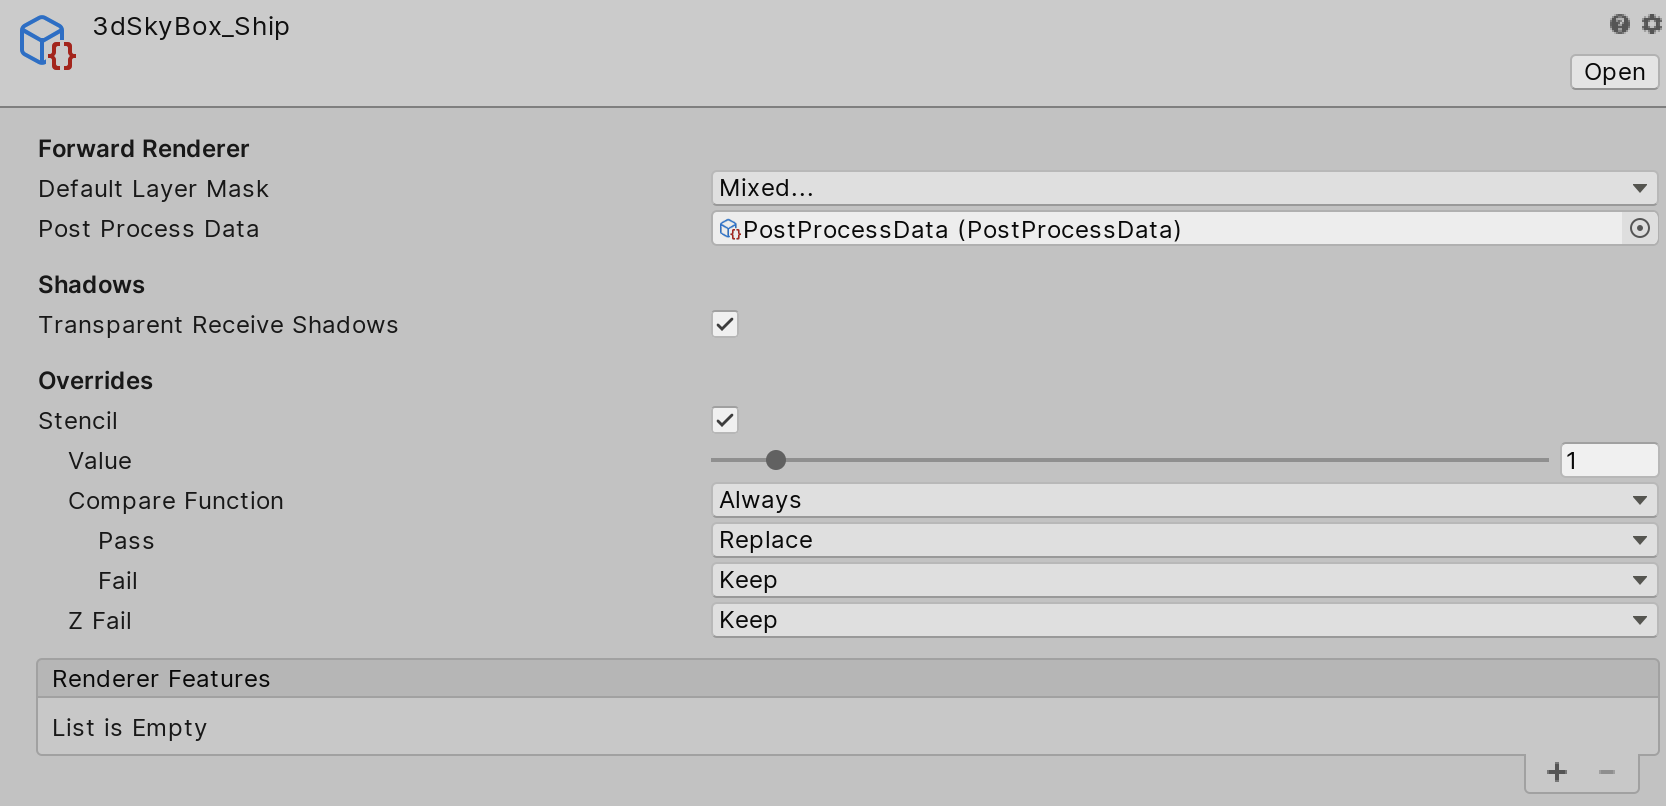
The thespian photographic camera render type is set to Base and is assigned the 3dSkyBox_Ship render pipeline. The background volition exist drawn by another camera and should be fix to Uninitialized. The stack is set such that planets are drawn afterward the send, and the stars are drawn terminal:

The return pipeline is setup to write "1" into the stencil buffer:
-
Default Layer Maskis gear up to ignore theSkyboxlayer as information technology will be drawn later. -
Stencilis overridden to incorporate a value of one in pixels where the ship has been fatigued. This is used to determine where the planet camera should draw planets.
Planet Photographic camera
The planet camera render type is set to Overlay and is assigned the 3dSkyBox_Planet render pipeline. Which overrides the stencil settings:

- Tests whether stencil buffer value is equal to nothing
- This will discard pixels already drawn by the player camera.
- Inverts the stencil value
- This will marking the newly drawn planets with non-nothing stencil values.
Star Camera
The star camera return type is also gear up to Overlay and is assigned the 3dSkyBox_StarBox render pipeline. The render pipeline overrides the stencil settings and too draws a sky box:

- Tests whether the stencil buffer value is equal to zero
- The previous two cameras ensured non-aught values on pixels that should not be overdrawn.
- The
SkyboxRenderFeaturebut adds aDrawSkyboxPassto the pipeline at theAfterRenderingOpaquesevent.
The Skybox Script
When the thespian flies effectually in the infinite send, the planets and stars will stand all the same since their cameras aren't rotating with the thespian. This can be solved using a simple script which will be put on the skybox cameras. The script volition have a reference to the player photographic camera and, each frame, make sure that their rotations align: transform.rotation = playerCam.rotation
Since the position of the skybox cameras is not changing, no parallax will be visible in the skybox when the role player moves. To solve this nosotros get the offset position of the skybox photographic camera in start() and keep it. Using a bladder variable proportionality we set the position of the camera each frame to be startPos + playerCam.position * proportionality. The lower the proportionality the less that skybox photographic camera moves and the bigger the skybox will seem. In the space example the proportionality is 0 for the star camera and 0.0002 for the planet camera. This means that the stars will seem infinitely far away, and the planets volition seem 5000 times larger than they actually are in the scene. If a non-zero proportionality is used, information technology is important to take boundaries for the playable surface area. Otherwise the player will be able to movement up shut to (and through) the sky box, breaking the illusion.

In the picture the closer planet is existence clipped by the virtually clipping plane of the planet skybox camera because the player has been allowed to freely move too shut to information technology.
Source: https://github.com/Unity-Technologies/UniversalRenderingExamples/wiki/3D-Skybox
Posted by: madisonbablin1977.blogspot.com
0 Response to "How To Set Skybox On Camera Unity"
Post a Comment