

How To Make A Dinosaur Model
How to create a realistic 3D dinosaur in 22 steps

Creating a realistic creature, particularly one that no longer exists like this dinosaur, requires reference and preparation. Usually, when I create a monster, my imagination is allowed to run free.
For this project, the creature actually existed so I have spent a lot of time building a library of reference to base my dinosaur on actual anatomy and make it as realistic as possible. For me, the T-rex is iconic so when I was asked to do a cover piece, there was no question which dinosaur I should choose. In this training we look at the workflow I used to create it.
01. Set up the scene in Maya
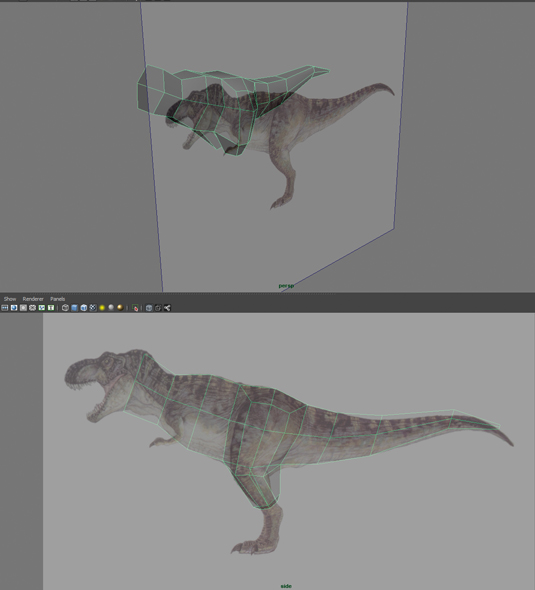
Choose a side view reference image of a dinosaur. Bring this into Maya to use it as a guide to build the base mesh. Create a side-facing plane and apply the image as a texture using a planar map in the X-axis.
Adjust the image to a square format for easier projection ratio and make the material slightly transparent. Add the reference plane to a displayLayer and set the display mode to Reference, so the plane isn't selectable in Maya's viewport.
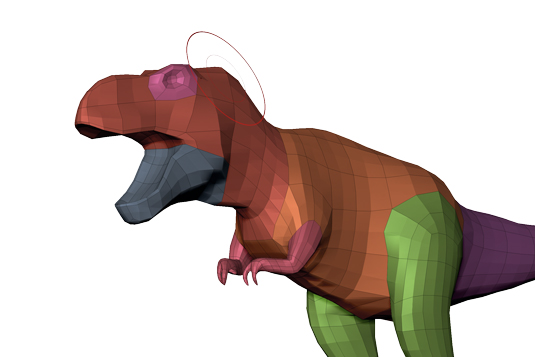
02. Create the base model
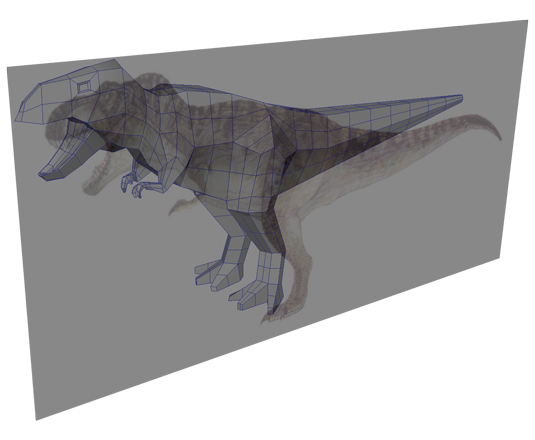
Start by creating a simple cube. You can then use Maya's polygon tools, such as Extrude Faces, to roughly fill the silhouette of the reference image. I modelled the base model using quads only – I wasn't concerned about modelling detailed features, I just wanted to set up its rough volume. Try to keep the distribution of polygons even and well spaced across the mesh. You can make adjustments in ZBrush later.
03. Set the features
Add a couple of spheres into the scene and position them roughly where you want the eyes to be. I find it easier to have something in place when it comes to sculpting the face.
Also create a simple model for the tongue, using Maya's polygon tools on a simple cube. Once done, select all the base models in the scene, and select Export Selection to create an .obj file containing all objects in one file.
04. Import into ZBrush
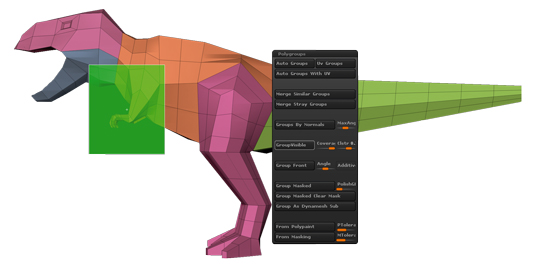
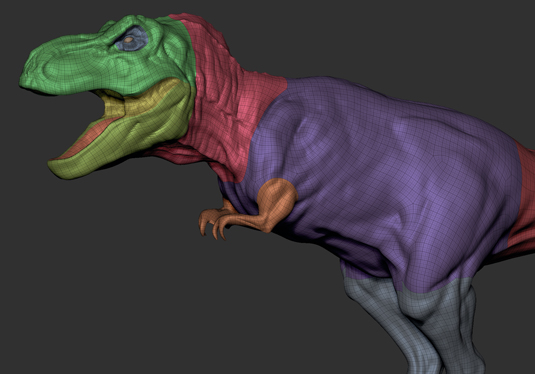
Import the .obj file into ZBrush. Then use Split To Parts (under Tool>Subtool>Split>Split To Parts) to break the mesh into individual subtools. Then use ZBrush's selection tools ([Ctrl]+[Shift] and click) on
the main body mesh to hide polygons. Use Tool> Polygroups>Group Visible to define polygroups for the visible polygons. I do this to make it easier for me to isolate the part of the body I want to work on.
05. Block out the dinosaur
One of the most important things to remember when using ZBrush is not to increase the subdivisions of the model too soon. I didn't increase the subdivs of my dinosaur mesh more than two times at this stage.
Use ZBrush's Move, ClayTubes and Smooth brushes to add rough volume and bulk to the shape, but not muscular detail or anything that specific. Use Symmetry (press [X]) to mirror working on both sides of the piece as this makes sculpting faster.
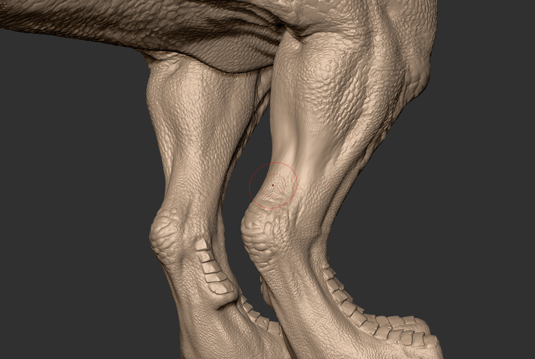
06. Add muscle mass

Use polygroups to hide parts of the dinosaur you aren't working on. Again, use the same brushes to add muscle volumes and creases, and sculpt in strokes following the direction of muscles. Increase the subdivision level as required, but don't up it too much too quickly.
When working, I constantly adjust the subdivision level depending on how much volume I want my painted strokes to effect. Refine the shape of the dinosaur's feet and arms.
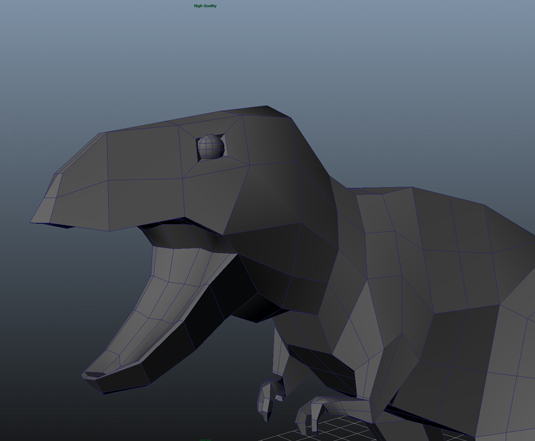
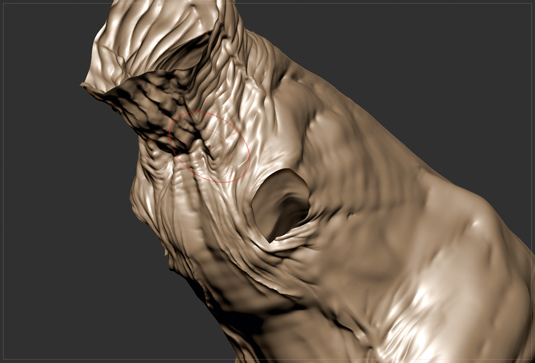
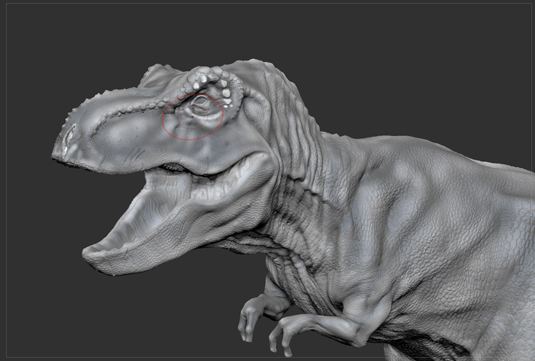
07. Shape the head

The head is different to the body as it has very little muscle between the skin and the skull bones. The head is mostly skull with massive jaw muscles, giving a distinctive solid shape.
Draw out the brow and jaw lines using ClayTubes to define the mandible. Mask the eye area ([Ctrl] and click off-model to invert-mask the selection), then use the Move tool to create the eye socket cavity. Again, I use polygroups to isolate the inside of the mouth to work on it.
08. Add shape to the body

Sculpting is a repetitive process of adding, smoothing and removing, just as if working with clay. Adding volume with the ClayTubes brush, smoothing with the Smooth brush and defining lines with the Crease brush.
There is no shortcut to a finished product here, practice makes a better sculptor so you may need to go over the same area several times before you are happy. Pay attention to how muscles interact with the skeleton and each other.
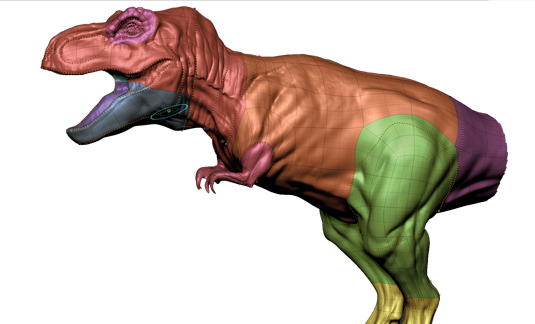
09. Add lumps and ridges
Once the muscle volumes are blocked out, add loose skin, facial lumps and ridges, elbows, knees and claws. Use the same brushes as before. Under the neck you'll find loose skin – create wrinkles using the Crease brush, getting a nice sharp line with plenty of side-to-side wiggle.
Use Smooth to dampen wrinkles, noting which way the skin would flow with shoulder and collar bone positions. Up the subdivision level to accommodate the added detail.
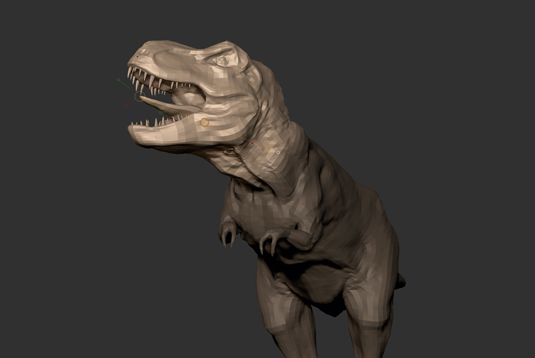
10. Clean up the geometry
Duplicate the dinosaur body. Draw ReMesher guides in areas where you want clean edge flow, such as around eyes, mouth, across the elbows, shoulders, hips and knees. Add guides around the tail at several intervals to stop edge loops sipralling down the whole tail.
Make sure Symmetry is active to give a tidier mesh. Type in your target plycount (around 15,000), and in about 30 seconds you have a brand new, cleaner typography for your dinosaur.
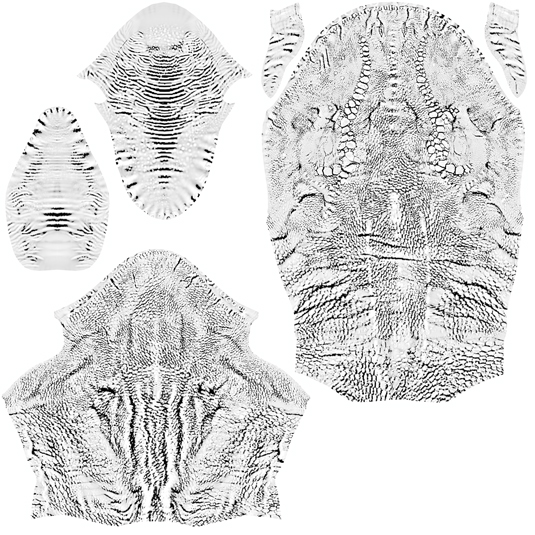
11. Create the UVs
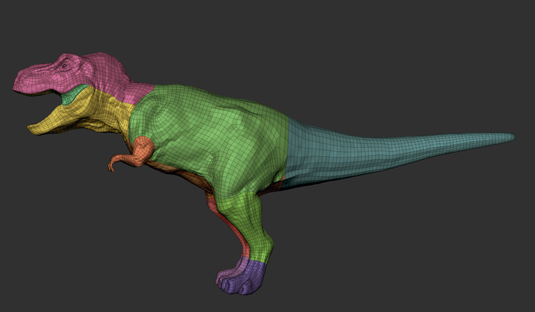
To make the UVs, I use UV Master in ZBrush. Create polygroups for different UV shells – for example, the head, mouth, arms, body and legs – then enable Colour Painting in UV Master. This allows you to paint in where you want the UV seams to be.
Paint the seams in slightly hidden areas (inside of legs and creases, for example). Activate Symmetry and polygroups in UV Master and click Unwrap. This gives a uniform layout with seams in defined areas.
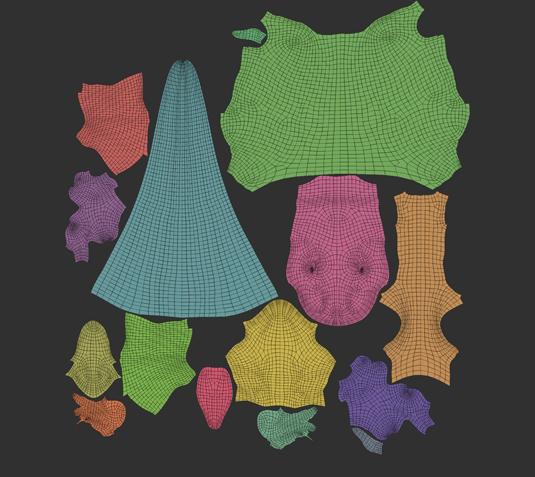
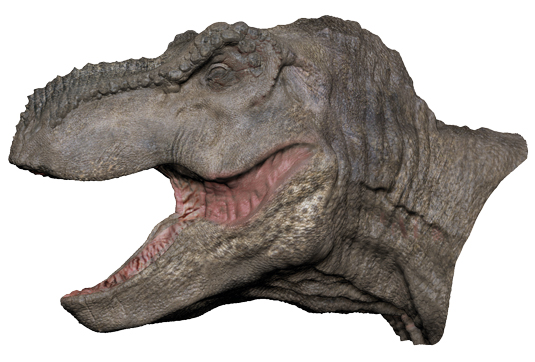
To manipulate the UVs further, export a .obj file of the mesh to Maya. Adjust the UV layout so that the head and mouth exist on one texture page and body, feet and legs on a second. Once happy with the base geometry and UVs in Maya, export a .obj and import this new base model into ZBrush. I put the head on a separate texture, as this will be a focal point so I want extra resolution for this area.
13. Transfer the data
Capture subdivision levels to the new mesh by shrink wrapping new geometry to the old. Duplicate the subtool for the old dinosaur's body. Turn on the original subtool, so both are visible. Go to the lowest subdiv level in the original mesh.
Use Subtool>Project>Project All to shrink wrap the new mesh to the old subtool. Increase subdiv level of original mesh and create a new subdiv for the new mesh. Repeat until all details are captured.
14. Add the finer details
ZBrush Central has some very useful alphas. Personally, I created a couple of greyscale images in Photoshop to use as custom alphas in ZBrush. I used the Standard brush set to an intensity of about 10, with a drag rectangle and my custom alphas, to paint in detail.
Turn Symmetry on in most areas to speed up workflow, but turn it off when working on the middle of the model and the head to avoid a mirrored 'butterfly effect' in the detail.
15. Paint the base colour
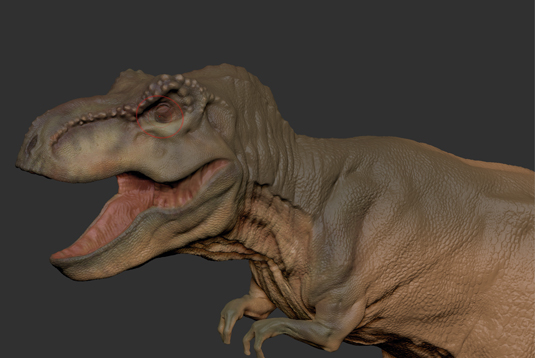
Block out a rough base colour pass using ZBrush's Polypaint. It is best to do this before you pose your model so that you can use Symmetry when painting; this will speed things up. You can use the Standard brush with Colour Spray, and also the Alpha 07 brush. The advantage to painting this way is that you don't have to worry about UV seams as you would if you were painting flat textures.
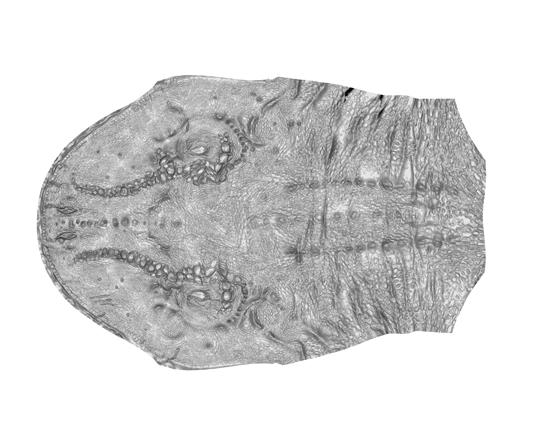
16. Create the specular map
Use Polypaint to quickly paint a seamless greyscale image, painting whiter in areas that are shinier, like the teeth, inner mouth and claws. Then export this Polypaint map to Photoshop using the Multi Map Exporter for later use.
Add a multiply layer of your cavity map, so it is dark on the image and, therefore, matte in the deeper wrinkles and deeper details of the surface. Again, adjust the layered cavity map image using brightness and contrast until happy.
17. Pose the dinosaur
Posing is important, so take your time to get it right. Having an idea in mind before starting will help. Use Transpose Master to create a T-pose from the mesh, then you can use its tools to mask and pose the model.
Using the Move tool, tweak and pinch volumes to get close to your final pose while maintaining balance. Once happy, return to the Transpose Master tool and click T-pose/SubT to transfer the new pose to all subtools.
18. Create the texture map
I use ZAppLink and Photoshop to create my base skintones texture map. When I created this particular map, I was concerned with capturing a basic tone map for the skin, with some very simple skin noise detail.
You can use photographic references of an elephant and rhino skin in layers in Photoshop to create images to use with ZAppLink to project onto your dinosaur. Again, doing it this way means you don't have to worry about UV seams.
19. Baking out textures
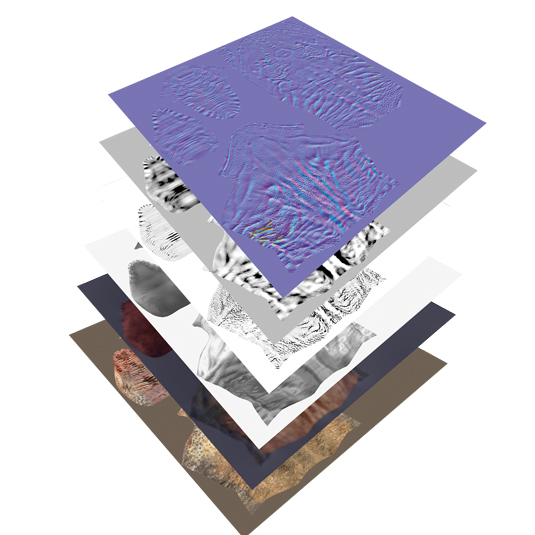
Using ZBrush's Multi Map Exporter, bake out images from the final model. Bake out the Colour, Cavity, Ambient Occlusions and Normal maps (I used 8k to capture all the detail).
I had set my UVs up to use two UV patches (UDIMS) – for example, it had UVs offset designed to use a second texture page – so when I used MME, it created two sets of images: one for the objects in the head and another for the body objects.
20. Create a diffuse map
When working in layers in Photoshop, keeping a non-merged version of the .psd is a good idea – it makes it easier if you decide to make changes later. Layer your maps with the base skin tone map as the base, adding the Ambient Occlusion map, the Cavity map and the Base Colour map, tweaking the opacity, brightness and contrast as you go. Keep this subtle; you don't want to fight the lighting in the render.
21. Free the detail
Onto your layers, add a small amount of fake bump information using the blue channel copied from the exported Normal map. Again, adjust the opacity, brightness and contrast and the layer's blend mode. Because the head and body texture maps have to match seamlessly, every tweak done to one texture has to be done to the others. These techniques apply to other areas, such as the eyes and tongue.
22. Tweaking in Photoshop
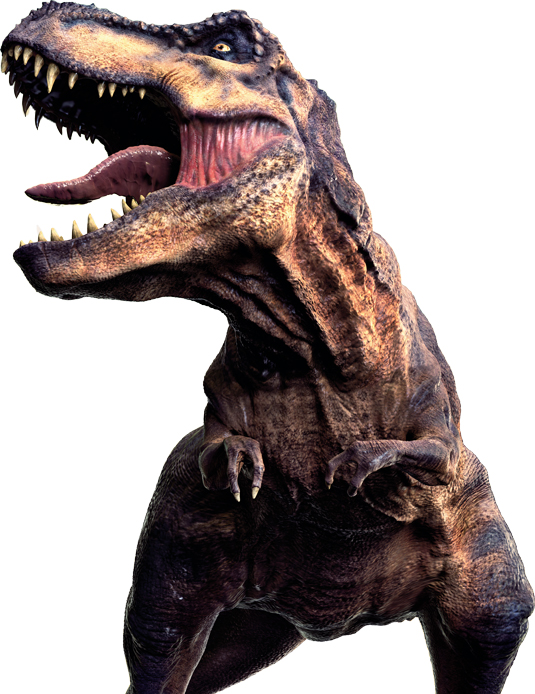
In Photoshop, put together the background and the dinosaur renders from KeyShot. Tweak the colours of the different layers so they match better, set some layers to Overlay and Multiply to bring out certain aspects of the render. You can apply filters to enhance the image; I downloaded a set of actions mimicking similar effects to Instagram, which I thought would give the image a nice stylised finish.
Words: Jonathan Reilly
With over 15 years' experience in games and movie visual effects, Jonathan Reilly is credited on numerous AAA titles. This article originally appeared in 3D World issue 182.
Related articles
How To Make A Dinosaur Model
Source: https://www.creativebloq.com/3d/how-create-realistic-3d-dinosaur-22-steps-91413021
Posted by: madisonbablin1977.blogspot.com
0 Response to "How To Make A Dinosaur Model"
Post a Comment